
MySQL adalah sistem database relasional. Dalam tutorial kami sebelumnya, Anda menginstal Apache dan PHP di Amazon Linux. Tutorial ini akan membantu Anda menginstal MySQL 5.7 di sistem Amazon Linux.
Langkah 1 – Persiapan
Login ke sistem Fedora Anda dan buka terminal. Sekarang perbarui paket saat ini ke versi terbaru dengan menjalankan perintah berikut.
yum update
Langkah 2 – Install MySQL Server
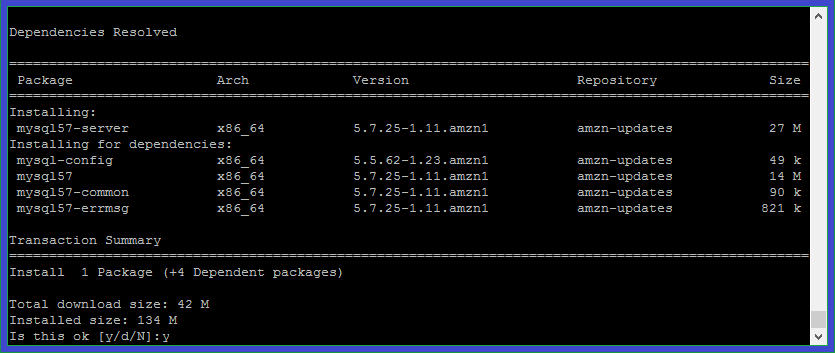
Setelah itu jalankan perintah berikut untuk menginstal paket MySQL 5.7 pada sistem Anda. Ini juga akan menginstal semua dependensi yang diperlukan lainnya.
yum install mysql57-server
Setelah instalasi server MySQL pada sistem Fedora. Aktifkan layanan MySQL untuk memulai secara otomatis saat sistem boot. Juga, mulai layanan menggunakan perintah di bawah ini::
service mysqld start
chkconfig mysqld on
Oke, sekarang ikuti instruksi pasca instalasi.
Langkah 3 – Konfigurasi MySQL
MySQL community server telah diinstal pada sistem Anda. Sekarang jalankan perintah berikut untuk menerapkan keamanan di server MySQL. Cukup jalankan perintah di bawah ini dan ikuti wizard keamanan.
mysql_secure_installation
Ikuti instruksi pada layar. Ubah kata sandi akun root Anda dan Tekan Y untuk semua operasi lain untuk menerapkan keamanan yang ditingkatkan.
VALIDATE PASSWORD PLUGIN can be used to test passwords
and improve security. It checks the strength of password
and allows the users to set only those passwords which are
secure enough. Would you like to setup VALIDATE PASSWORD plugin?

Press y|Y for Yes, any other key for No: y

There are three levels of password validation policy:

LOW    Length >= 8
MEDIUM Length >= 8, numeric, mixed case, and special characters
STRONG Length >= 8, numeric, mixed case, special characters and dictionary       file

Please enter 0 = LOW, 1 = MEDIUM and 2 = STRONG: 0
Please set the password for root here.

New password:

Re-enter new password:

Estimated strength of the password: 100
Do you wish to continue with the password provided?(Press y|Y for Yes, any other key for No) : y
By default, a MySQL installation has an anonymous user,
allowing anyone to log into MySQL without having to have
a user account created for them. This is intended only for
testing, and to make the installation go a bit smoother.
You should remove them before moving into a production
environment.

Remove anonymous users? (Press y|Y for Yes, any other key for No) : y
Success.


Normally, root should only be allowed to connect from
'localhost'. This ensures that someone cannot guess at
the root password from the network.

Disallow root login remotely? (Press y|Y for Yes, any other key for No) : y
Success.

By default, MySQL comes with a database named 'test' that
anyone can access. This is also intended only for testing,
and should be removed before moving into a production
environment.


Remove test database and access to it? (Press y|Y for Yes, any other key for No) : y
 - Dropping test database...
Success.

 - Removing privileges on test database...
Success.

Reloading the privilege tables will ensure that all changes
made so far will take effect immediately.

Reload privilege tables now? (Press y|Y for Yes, any other key for No) : y
Success.

All done!
Langkah 4 – Konek ke MySQL via Terminal
Semua selesai. Anda sekarang dapat terhubung ke server MySQL menggunakan baris perintah. Perintah berikut akan menghubungkan MySQL yang berjalan di localhost sebagai pengguna root. Sebelum login, MySQL akan meminta kata sandi akun root.
mysql -u root -p

Enter password:
Welcome to the MySQL monitor.  Commands end with ; or \g.
Your MySQL connection id is 5
Server version: 5.7.25 MySQL Community Server (GPL)

Copyright (c) 2000, 2019, Oracle and/or its affiliates. All rights reserved.

Oracle is a registered trademark of Oracle Corporation and/or its
affiliates. Other names may be trademarks of their respective
owners.

Type 'help;' or '\h' for help. Type '\c' to clear the current input statement.

mysql>